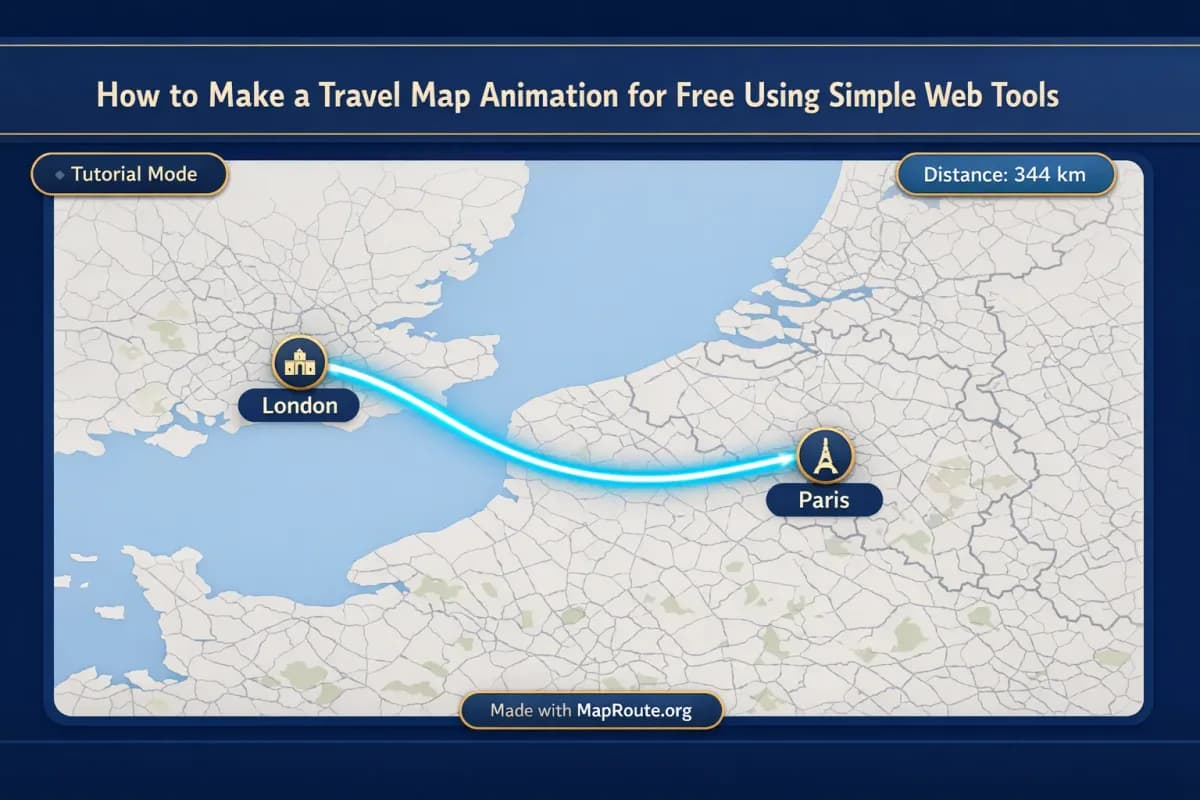
Why free web tools are enough for great travel map animations
You can make a clean travel map animation for free using simple web tools in a browser. A practical stack is Map Route for the two-city clip, plus one of Mapimator, AvoMap, Anim8map, or Google Earth Studio if you need a different map look, a GPS track, or an Earth flyover — then finish in any editor you already use.
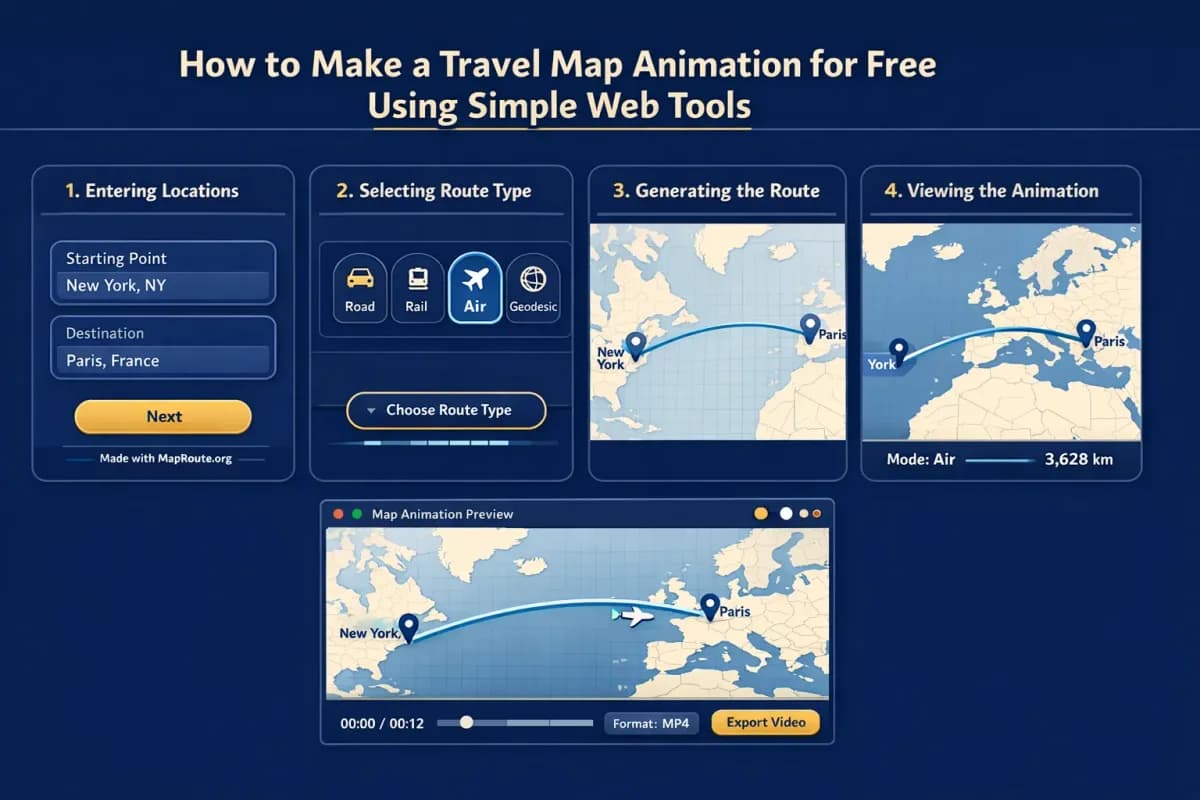
This guide uses Map Route (maproute.org) as the detailed how-to: pick From and To, choose road, rail, air corridor, or geodesic, generate, and download. The next section names the other web tools so “simple web tools” is not a synonym for a single product.
Map Route is a visualizer, not a booking engine or timetable. It doesn’t prove that a bus, train, or airline operates a specific route, and it doesn’t sell tickets.
Simple web tools you can actually combine
Keep the stack small. You do not need all five for one video. Pick one map generator, then one editor.
- Map Route — Two-point travel map animation with a km tracker. The step-by-step below uses this tool.
- Mapimator — Browser map studio if you need more route/marker control than a single From/To generate.
- AvoMap — Browser route video if you already have a GPX or KML track.
- Anim8map — Lightweight web travel map video from pins.
- Google Earth Studio — Cinematic Earth camera when the story is a globe flyover rather than a labeled journey.
- Your existing editor — CapCut, DaVinci Resolve, Premiere, Final Cut, or iMovie for voiceover, music, and cuts. Map Route does not edit audio.
That last item is six on purpose: five map tools plus the editor you already have. After Effects is optional, not required.
Step‑by‑step: creating your first free travel map animation
1. Open the tool in your browser
Go to maproute.org in any modern browser (for example Chrome or Safari). There’s nothing to install and no desktop plugin to configure. The player and composer run entirely in the browser.
You can start generating journeys without an account, but logged‑out visitors are limited to three generates and cannot download image or video exports. If you know you’ll want to save the animation, create a free account and verify your email first.
2. Set your From and To locations
In the composer on the homepage or the dedicated composer section, you’ll see two search boxes: From and To. Type at least two characters to search for a city, region, or country. Suggestions show a label, some context, and a small badge that hints at the kind of place (for example, city vs region).
For a rail example, try a classic route like "London" to "Paris" and choose the city options. For an air‑travel example, try "Delhi" to "London" to visualize a long‑haul corridor.
Place search uses public geocoders (Photon with Nominatim fallback). Coverage is broad but not guaranteed for every village or airport code; if a place doesn’t resolve, try a nearby city or a broader region.
3. Choose a visualization mode
Map Route offers four visualization modes. These change how the line is computed and what the distance label means:
- Road – a typical road path from a routing engine between your two places. This is a road geometry, not a bus timetable.
- Rail – the railway alignment between the locations, if geometry can be found. It’s not a train ticket, and not proof that a passenger service runs that route.
- Air corridor – an estimated great‑circle line between the two points, suitable for flight‑style visuals. It’s not a filed flight plan or proof that airlines fly that city pair.
- Geodesic – the straight‑line distance on the globe, useful when you just want a simple “as‑the‑crow‑flies” line.
For London to Paris on a train‑style animation, pick Rail. For Delhi to London, choose Air corridor to show a long‑haul flight path. If road or rail geometry cannot be computed for a pair, the player will say so and offer a geodesic alternative.
4. Generate and preview the journey
Click Generate Journey. You’ll see a short sequence of prep stages: Resolving places → Requesting geometry → Framing the map → Preparing journey. If geometry is found quickly, the last stage is brief.
Once ready, the player will show your map with a marker or vehicle icon at the origin. Press Play to watch it travel along the computed line. You can use the built‑in controls to:
- Play, Pause, or Replay the animation
- Change playback speed between 1x, 2x, and 4x
The duration at 1x is calculated from the distance—typically between about 8 and 28 seconds—so short hops feel snappy and long hauls have room to breathe. A km tracker in the corner shows the length of the computed line (for example, an air corridor estimate or a road path km). It’s not driving time or an airline’s official mileage.
5. Adjust your window for the right aspect ratio
Map Route doesn’t have an aspect‑ratio picker. Instead, it follows the width of your browser window:
- On phones or a narrow window under 768px wide, exports are 9:16 (vertical). This fits TikTok, Instagram Reels, YouTube Shorts, and Stories.
- On wider windows (768px and up), exports are 16:9 (landscape). This suits YouTube vlogs and widescreen intros.
Before you capture or download, set your device the way you intend to publish: phone upright for vertical clips, or a maximized browser on desktop for landscape.
6. Create a free account to download
If you’re logged out, you can view up to three generated journeys, but you won’t see download options. To save your animation:
- Click Register on maproute.org.
- Sign up with a non‑disposable email address.
- Verify your email (unverified accounts cannot log in, generate, or download).
A verified free account lets you use Map Route up to 5 times per UTC day in total. Each Generate Journey, Download Video, and Export Image counts as one use, and the counter resets daily.
7. Download video or a still image
With a verified account and your journey loaded, you’ll see two export options:
- Download Video – records a capture of the animation you’re watching in the browser, including the moving marker and km tracker. When supported by your browser, this is saved as MP4 (H.264); otherwise, as WebM.
- Export Image – saves a WebP still of the current frame, in the same 9:16 or 16:9 aspect as your player.
Downloads include a small “Made with MapRoute.org” watermark. There is no watermark‑free export in the current product.
Because the video is captured in your browser rather than a guaranteed server‑rendered HD pipeline, capture can fail in some browser setups. If that happens, the player will still work and show a notice; you can try another modern browser or a different device.
8. Combine with your footage in an editor
Map Route is not a full video editor. It doesn’t add titles, voiceover, B‑roll, or music. The typical workflow is:
- Download your travel map animation clip.
- Import it into your editor of choice (DaVinci Resolve, CapCut, VN, Premiere Pro, iMovie, etc.).
- Add your talking‑head or travel footage before/after the map segment.
- Layer text, stickers, and your soundtrack.
- Export the final video in the format your platform prefers.
What Map Route actually does (and what it doesn’t)
When you’re looking for “simple web tools” to make a travel map animation, it helps to know exactly where Map Route fits—and where you’ll still rely on other apps.
Focused on two‑point journeys
Every Map Route animation is built around exactly two endpoints: one From and one To. There is no multi‑stop waypoint editor inside the tool. If your trip has multiple legs—say Delhi → Istanbul → London, or London → Paris → Zurich—you’ll need to generate each pair separately and stitch the clips together in your editor.
For example, to show a multi‑leg rail journey from London to Paris to Zurich, you would:
- Generate London → Paris in Rail mode and download the video.
- Generate Paris → Zurich in Rail mode and download the video.
- Place the two clips back‑to‑back in your editing software.
Map Route cannot combine plane + train + road in one continuous file. Each mode and leg is its own journey.
Automatic camera and map framing
The animation runs on a MapLibre map with a light political‑style basemap (OpenFreeMap / OpenStreetMap data). The camera framing is automatic: short hops are shown closer in, long hauls are framed wider, and paths that cross the date line are handled safely. There’s a subtle pitch on some distances (around 22° for mid‑range journeys, tapering off for very short or very long lines), but you cannot set custom camera paths, orbits, or keyframes like you would in a motion‑graphics suite.
Distance labels that stay honest
The km tracker shows the length of the geometry Map Route actually computed, with a label such as road path km, railway geometry km, air corridor estimate km, or geodesic km. It’s not a schedule, not a promise of travel time, and not an airline’s published mileage. For a Delhi to London air corridor, the number represents the great‑circle estimate; for London to Paris by rail, it reflects the railway alignment as derived from the map data.
Browser‑based, free to start
Map Route runs on phones and desktops in the browser. Place search, generate, play, pause, and replay work on both. The tool is free to use, with limits tied to your account status and daily usage. Paid plans exist only as a manual upgrade via the account page; there’s no self‑serve checkout or hidden paywall that unlocks extra export formats.
Practical example routes: from rail hops to long‑haul flights
To make this concrete, here’s how you might build two different travel map animations using the same simple workflow.
Example 1: London to Paris by rail
Imagine you’re recapping a weekend trip from London to Paris and want a short rail animation to open your vlog or Reel.
- Open maproute.org and search From: "London" (select the city).
- Search To: "Paris" (select the city).
- Choose Rail as the visualization mode.
- Generate Journey and preview the railway alignment animation.
- On phone, keep the device vertical for a 9:16 clip; on desktop, maximize your browser for 16:9.
- With a verified account, Download Video.
- In your editor, place the map clip at the very start, then cut to shots of St. Pancras, the train interior, and your arrival in Paris.
Remember that the rail line shown is based on railway geometry from map data. It’s not proof that a particular train service operates or that tickets are available.
Example 2: Delhi to London by air corridor
For a long‑haul journey, an air‑style animation helps viewers grasp the distance instantly.
- Set From: "Delhi" and To: "London".
- Select Air corridor mode to get an estimated great‑circle line.
- Generate Journey and watch the marker travel the route, with an air corridor estimate km label.
- Adjust playback to 1x for a more relaxed feel or 2x/4x for a snappier social clip.
- Download Video once you’re happy with the framing and aspect.
- In your editor, put this clip right before boarding footage or as a transition between your India and UK segments.
Again, the air corridor line is a geographic estimate, not a real‑time flight tracker or proof that a specific airline flies that exact path.
Optimizing your map animations for TikTok, Reels, and Shorts
If your main goal is social content, a few small decisions when you generate and export will save you time later.
Match the aspect ratio to your platform
For TikTok, Instagram Reels, and YouTube Shorts, you want a vertical 9:16 clip. Map Route gives you that automatically whenever the browser window is under 768px wide. The simplest approach is to generate and download directly on your phone in portrait orientation.
If you prefer working on desktop, narrow the browser window until the player is vertical, then generate and export. For YouTube intros or landscape videos, keep the window wide for 16:9.
Keep clips short and focused
At 1x speed, Map Route animations typically run 8–28 seconds depending on distance. For social platforms, that’s usually enough; you don’t need to trim much. If you want an even punchier feel, set the player to 2x or 4x and download while it’s playing at that speed, then add text overlays in your editing app.
Use Map Route as a hook, not the whole story
Most high‑performing travel clips use the map animation as a hook or transition, not the entire video. A simple structure could be:
- 0–3 seconds: Map Route clip showing London → Paris by rail.
- 3–10 seconds: Quick cuts of train boarding and window views.
- 10–20 seconds: Your favorite Paris moments, with captions.
Because Map Route doesn’t handle audio upload or beat sync, you’ll line up your map segment with music in your editor. Just drag the clip until the marker movement hits on a beat or lyric you like.
Using travel map animations in longer vlogs
For longer YouTube vlogs or episodic travel series, Map Route works best as a recurring visual motif: a quick, consistent way to show where the story is moving next.
Design a repeatable map style for your series
Because Map Route’s style is consistent—a light basemap, a moving marker, and a km tracker—you can generate similar clips for each leg of your journey and drop them at key transitions. Viewers quickly learn to associate that animation with "new chapter" moments.
For example, in a multi‑episode trip from Delhi to London with stops along the way, you might:
- Open each episode with a 16:9 Map Route clip showing the leg covered in that video.
- Overlay text in your editor like "EP 3 – Istanbul to London".
- Use the km tracker as a talking point in your voiceover (clarifying that it’s an estimated distance, not flight time).
Add voiceover, titles, and B‑roll outside Map Route
Map Route intentionally stays simple: it doesn’t record voiceover, doesn’t let you add titles or lower thirds, and doesn’t sync to audio. All of that happens in your editing software. A basic workflow for a YouTube vlog would be:
- Generate a 16:9 clip for the leg you’re covering.
- Record a short voiceover explaining the journey.
- In your editor, place the map clip, then add your voiceover on top.
- Add text labels and any branding you want around (not over) the Map Route watermark.
The Export Image option is handy if you want a still map for thumbnails or chapter cards. You can capture the frame you like and then design around it in your thumbnail tool.
How Map Route compares to heavier tools like After Effects
You might be wondering whether you really need motion‑graphics software or mobile‑only apps for this, or if a browser‑based tool is enough. Here’s a high‑level comparison to help you choose the right workflow.
| Tool type | Setup & cost | Route handling | Editing & effects | Best for |
|---|---|---|---|---|
| Map Route | Browser; free with daily generate/download limits | Two-point road, rail, air corridor, or geodesic clips with km tracker | No titles or music; watermark on export; stitch multi-leg trips in an editor | Fast, honest two-city journey clips |
| Mapimator | Browser map studio (check current plans) | Routes, markers, and video export | Not the same as Map Route’s two-point km tracker | When you need more map-studio control |
| AvoMap | Browser (check current plans) | GPX/KML or drawn route videos | Confirm mixed-mode details on avomap.com | When you already have a GPS track |
| Anim8map | Browser (check current plans) | Pinned-route travel map videos | Confirm watermark and limits on the live site | Lightweight web route clips |
| Google Earth Studio | Desktop browser; Google product | Cinematic Earth flyovers | Not a labeled km-tracker journey | Globe-scale establishing shots |
| Desktop motion-graphics suite (e.g., After Effects) | Installed, typically paid | Fully custom paths and cameras | Steep learning curve | Channels that already live in After Effects |
The trade‑off is straightforward: Map Route is fast, focused, and free in the browser, but expects you to handle storytelling and editing elsewhere. Desktop suites and some mobile apps can do more inside one program, but cost money and take longer to learn. If your priority is simply "show this route cleanly" rather than "design a custom 3D camera fly‑through", Map Route is usually the most efficient option.
Pre‑publish checklist for clean travel map animations
Before you export from Map Route
- Confirm your From and To locations resolve correctly (city, region, or country as needed).
- Pick the right mode (Road, Rail, Air corridor, or Geodesic) for the story you’re telling.
- Check that the km tracker label matches your intent (road path km, air corridor estimate km, etc.).
- Set your browser window to vertical (phone or narrow desktop) for 9:16, or wide for 16:9.
- Play the animation once at your chosen speed (1x, 2x, or 4x) to confirm pacing.
- Log into a verified account so Download Video and Export Image are available.
- Remember that the export will include a “Made with MapRoute.org” watermark.
Before you publish your final edit
- Trim the map clip so it doesn’t overstay its welcome—aim for 3–10 seconds in most social videos.
- Add clear text or voiceover explaining what the viewer is seeing (for example, "Delhi to London flight route").
- Avoid placing important text directly over the Map Route watermark.
- Double‑check that you’re not presenting the animation as a live tracker, ticket, or official timetable.
- Export in the platform’s recommended resolution and test playback on your phone.
Finding inspiration and sharing your routes
If you’re not sure where to start, Map Route’s Explore page offers curated example pairs you can regenerate in your own browser. It’s not a social feed and doesn’t host user‑generated timelines, but it’s a quick way to see what different distances and modes look like.
Once you’ve found a style you like, the Copy link button in the player lets you save or share a URL that encodes the From, To, and mode. Opening that link regenerates the same journey on your device, ready for replay or export. This is handy if you collaborate with editors: one person can set up the route, and another can handle the capture and post‑production.
Because reading the Map Route blog and browsing examples doesn’t consume your generation quota, you can research and plan your animations in advance, then use your daily free generates only when you’re ready to capture.
FAQ
Is Map Route really free to use for travel map animations?
Yes. Map Route is free to use in your browser. Logged‑out visitors can Generate Journey up to 3 times but cannot download images or videos. With a verified free account, you can use up to 5 actions per UTC day, where each Generate Journey, Download Video, and Export Image counts as one use. There is no self‑serve paid checkout; paid plans exist only as a manual upgrade via the account page.
Do I need to install any software or plugins to make a map animation?
No. Map Route is entirely browser‑based. You open maproute.org in a modern browser like Chrome or Safari, search your From and To locations, choose a mode, and generate the animation. There are no desktop plugins or separate apps to install.
Can I create multi‑stop routes in one animation?
Not inside a single Map Route journey. Each generate uses exactly two endpoints: one From and one To. There is no multi‑stop waypoint editor. To show a multi‑leg trip, you generate each pair separately—for example, London → Paris, then Paris → Zurich—and combine the exported clips in your own video editor.
Are there watermark‑free exports?
No. All video and image downloads from Map Route currently include a “Made with MapRoute.org” watermark. There is no watermark‑free export option in the product right now, so plan your layout and any added text so that the watermark remains unobstructed.
What devices and browsers does Map Route work on?
Map Route works on phones and desktop in modern browsers, including common options like Chrome and Safari in typical use. Place search, generate, play, pause, and replay work across devices. Image and video downloads require a verified account. Because exports are captured in the browser, some browser setups may not support video capture reliably; in that case, the player will still work and show a notice, and you can try another modern browser or device.
What export formats are available for my travel map animation?
For video, Map Route captures the animation you see in the player as an MP4 (H.264) file when supported by your browser, or as WebM otherwise. For stills, Export Image saves a WebP image of the current frame in the current aspect ratio. These exports include the km tracker and a “Made with MapRoute.org” watermark. There is no separate resolution picker or guaranteed server‑rendered HD pipeline; the capture is done in your browser.
Does Map Route show real‑time flights or guarantee that a route exists?
No. Map Route visualizes geography between two places; it is not a real‑time flight tracker, not a live cruise AIS map, and not a booking or timetable system. Road paths, railway alignments, air corridors, and geodesic lines are computed from routing engines and map data. They do not prove that a bus, train, or airline operates a specific service, nor do they sell or validate tickets.
Can I add music, voiceover, or text inside Map Route?
No. Map Route focuses on generating the travel map animation itself. It doesn’t handle audio upload, beat sync, titles, lower thirds, or B‑roll. The recommended workflow is to download the Map Route clip and then add music, voiceover, and on‑screen text in your own editing software.