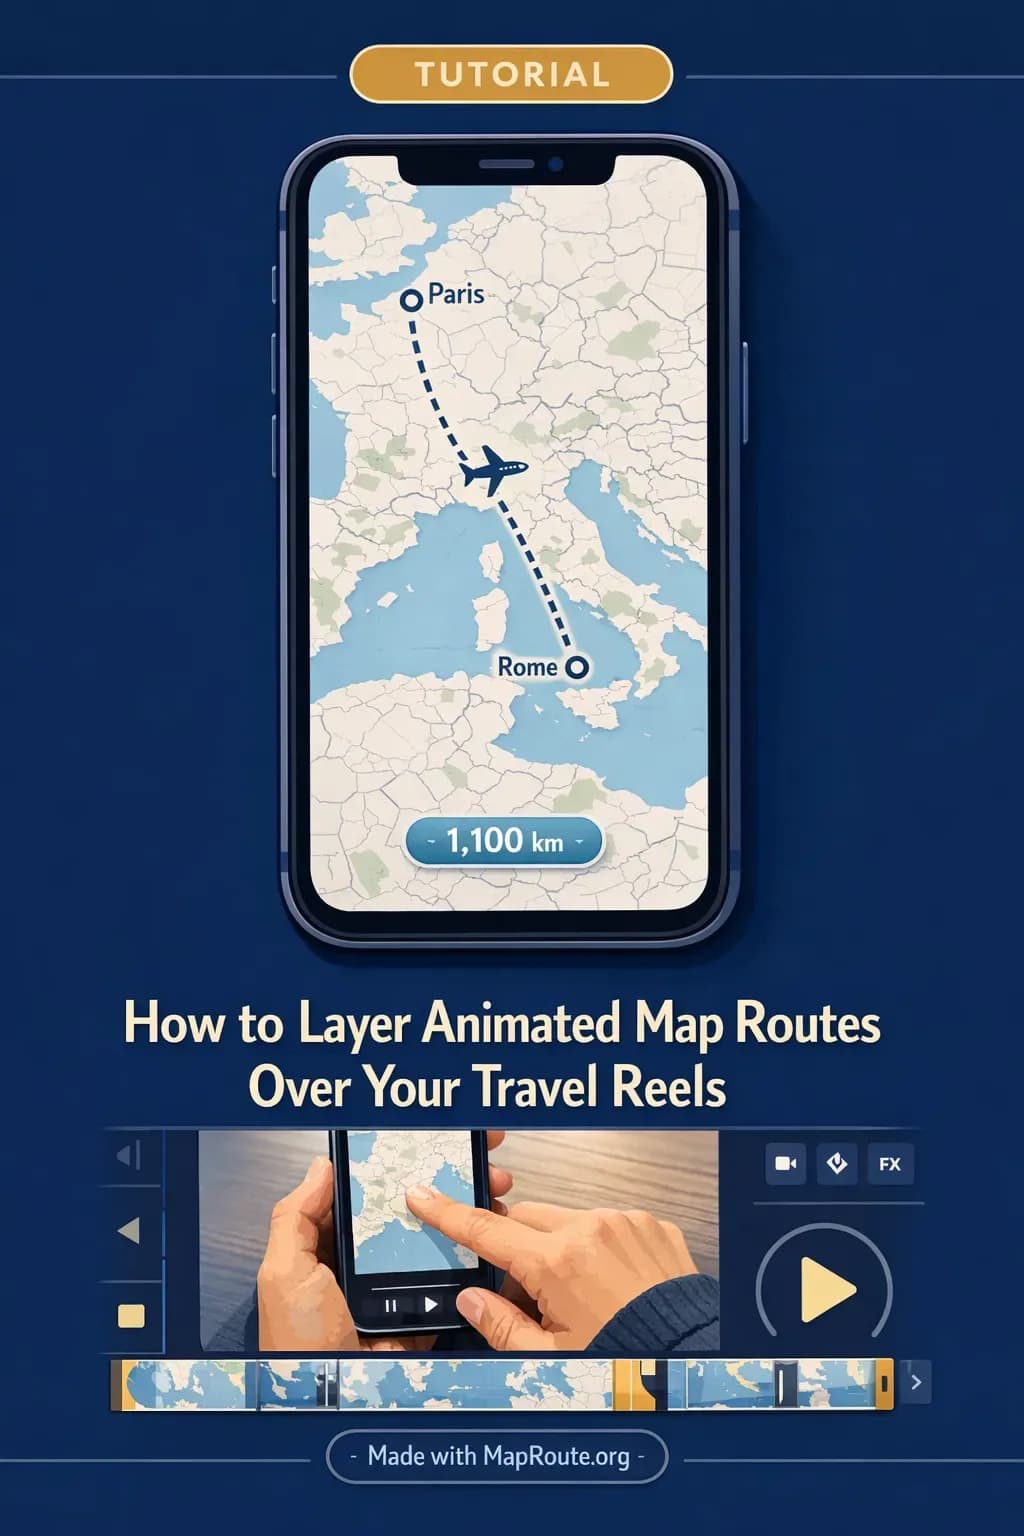
Why map overlays make your travel reels pop
Layering an animated map route over your travel reels helps viewers instantly understand where your journey is happening. You can create that map animation in your browser with Map Route, then overlay it on top of Instagram Reels, TikToks, or YouTube Shorts in your normal editor.
This guide walks through a practical workflow: generating a clean route animation (for example, Paris to Lyon by rail or Delhi to London by air corridor), exporting it, and compositing it as an overlay in tools like CapCut, VN, Final Cut Pro, or Premiere Pro. You’ll also see how to match aspect ratios, keep the animation readable on a phone screen, and stay within Map Route’s real limits (two endpoints per journey, no multi-stop editor, and exports that always include a watermark).
Step‑by‑step: From map animation to reel overlay
1. Plan what the map overlay should explain
Before you open any tools, decide what your map overlay needs to do. Is it just a quick "here’s where this is" moment, or a mini-story of a long-haul journey?
- For a single hop reel (e.g., Paris to Lyon by rail), one Map Route animation is usually enough.
- For a long story (e.g., backpacking across Europe), break it into clear legs and plan separate clips for each.
- Decide if the map is a 2–3 second intro beat or a recurring visual that you cut back to during the reel.
2. Generate your animated route in Map Route
Map Route runs entirely in your browser. There’s no app install or desktop plugin. Open maproute.org in a modern browser (Chrome or Safari work in typical use) and you’ll see the journey composer.
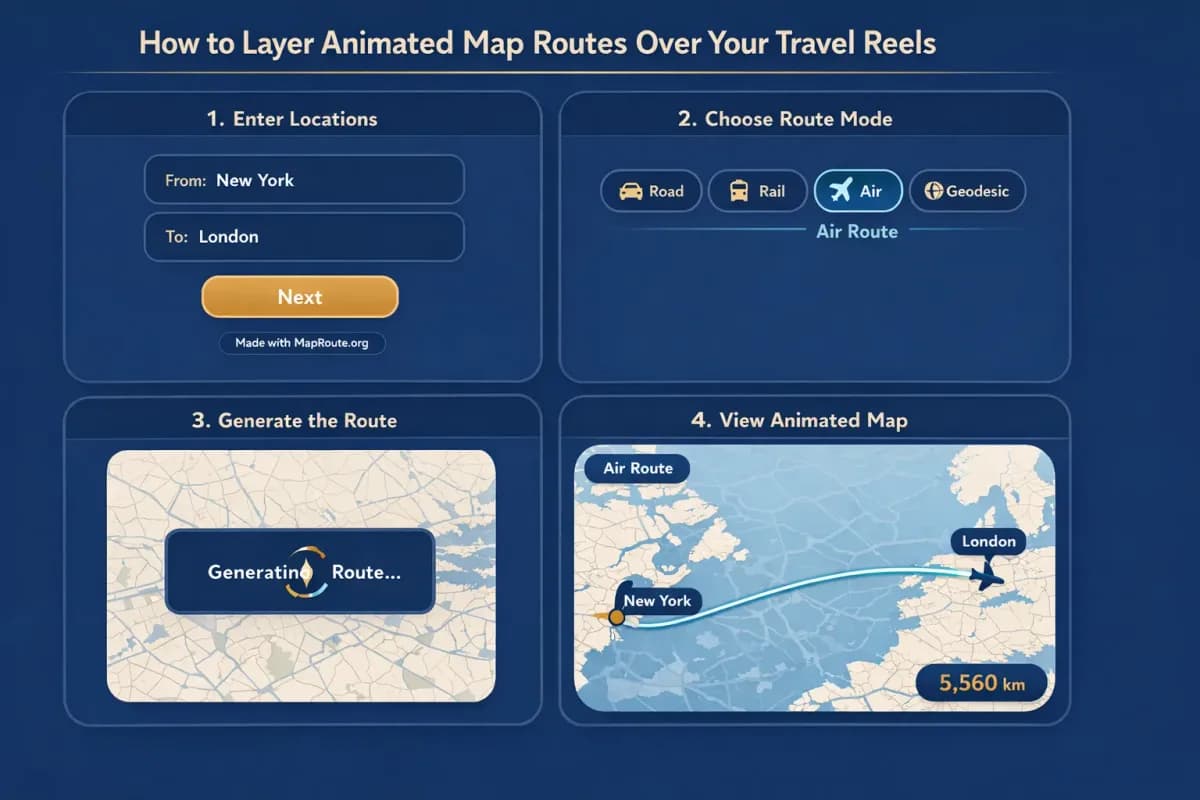
- In the From field, start typing your origin (at least 2 characters). For example, "Paris".
- Pick the correct suggestion from the list (check the label and context, like city vs region).
- In the To field, search your destination, such as "Lyon" or "London".
- Choose a visualization mode: Road, Rail, Air corridor, or Geodesic.
- Click Generate Journey and wait while Map Route resolves places, requests geometry, frames the map, and prepares the journey.
Each Map Route generate is exactly two endpoints. There’s no multi-stop editor and no way to combine plane + train + road in one file. For multi-leg trips, generate one clip per leg and stitch them in your video editor.
For a Paris → Lyon rail reel, pick Rail. For a Delhi → London long-haul, pick Air corridor for an estimated great-circle line. If rail or road geometry can’t be computed, Map Route will tell you and offer a geodesic line instead.
3. Set up the right aspect ratio for Reels or Shorts
Map Route doesn’t have an aspect ratio picker. Instead, it follows your browser window size:
- Below 768px wide (phone in portrait, or a narrow desktop window): the player is 9:16, ideal for Instagram Reels, TikTok, YouTube Shorts, and Stories.
- 768px wide and up (typical laptop or desktop): the player is 16:9, better for YouTube intros or landscape vlogs.
For travel reels, you usually want 9:16. Either use your phone in portrait or resize your desktop browser window until it’s narrow. Then regenerate or replay the journey so the animation plays in vertical format.
4. Download the map clip from Map Route
To layer the animation over your reel, you need the video file. Downloads require a free, verified Map Route account.
- Register on maproute.org and verify your email (temporary or disposable emails aren’t supported).
- Regenerate or replay your journey in the aspect ratio you want.
- Use Download Video to capture the animation you just watched.
Video is captured in your browser as MP4 (H.264) when supported, otherwise WebM. It’s not a guaranteed server-rendered HD export, and capture can fail in some browsers, though the player itself will still work.
The downloaded clip includes the km tracker and a "Made with MapRoute.org" watermark. There is currently no watermark-free export option.
5. Composite the map over your travel footage
Map Route isn’t a full video editor, so all overlay work happens in your own editing app. The exact steps vary by tool, but the logic is similar:
- Import your main travel footage (phone clips, B-roll, etc.) into your editor.
- Import the Map Route video clip as a separate layer or track.
- Place the map clip where you want it in the timeline (often at the start, or as a cutaway).
- Resize and reposition the map layer: full-screen for a strong opening, or smaller in a corner as a picture-in-picture overlay.
- Adjust opacity or add a simple mask if you want your footage visible behind the map.
At this stage you can also add music, voiceover, subtitles, and transitions. Map Route doesn’t sync to audio or accept sound uploads, so all beat-matching happens here in your editor.
6. Export and upload to your platform
Once you’re happy with the composite, export your reel in vertical format from your editing app and upload to Instagram Reels, TikTok, or YouTube Shorts. The Map Route watermark will be part of the map layer, just like any other visual element.
Map Route features that help with clean overlays
When you’re planning to layer map animations over travel reels, some Map Route behaviors matter more than others: clarity on a small screen, predictable timing, and a simple browser workflow.
Four visualization modes for different story types
You can choose exactly one visualization mode per journey:
- Road: a typical road path from a routing engine. Good for road trips or bus-like journeys (even though Map Route is not a bus timetable or booking tool).
- Rail: railway alignment when geometry is available. Ideal for reels about train travel, like Paris to Lyon by rail.
- Air corridor: an estimated great-circle line between two places. Great for long-haul reels such as Delhi to London, without implying it’s a specific airline flight.
- Geodesic: straight-line distance on the globe. Useful when road/rail geometry isn’t available or when you just want a clean, minimal line.
These are visualizations, not live trackers or proof of service. A rail animation isn’t a train ticket, and an air corridor isn’t a filed flight plan.
Automatic camera framing that works on phones
Map Route uses a MapLibre map with an OpenFreeMap / OpenStreetMap-based basemap. The camera framing is automatic: short hops are framed tightly, long hauls more widely. There’s a subtle pitch on many journeys (around 22° under ~1800 km, around 8° under ~5000 km, and 0° for very short or very long routes), but you can’t customize camera paths or set keyframes.
This means your overlays will always have a consistent, readable look: a moving marker along a clearly visible line, with the km tracker in view. The map is not a 3D globe export and doesn’t provide cinematic orbit moves, but it’s fast to generate and easy to read on a vertical screen.
Predictable animation length for pacing your reel
At 1x speed, Map Route automatically picks a duration based on distance, usually around 8–28 seconds (roughly 6 + distanceKm/400, with limits). You can change playback speed to 2x or 4x in the player, which is useful for testing pacing before capture.
Because the duration is tied to distance, a Delhi → London air corridor will run longer than a short Paris → Lyon hop at the same speed. For quick Reels intros, you can trim the downloaded clip down to a 2–4 second segment in your editor.
Browser-only workflow and account limits
Everything happens in your browser—no plugins, no project files to manage. Reading the blog or browsing Explore doesn’t consume any quota, but generating and downloading does.
- Logged-out visitors can Generate Journey up to 3 times, but cannot download images or videos.
- With a verified free account, you have 5 combined uses per UTC day. Each Generate Journey, Download Video, and Export Image counts as one use.
- Sessions last 14 days, and there’s no self-serve checkout; any paid plan is a manual upgrade via the account page.
Concrete overlay ideas using real routes
Paris to Lyon by rail: a compact city-hop reel
This route is perfect for a short, punchy reel: a recognizable city pair, a manageable distance, and a clear story (city break, food trip, or TGV experience).
- In Map Route, set From to Paris and To to Lyon, then choose Rail.
- Generate the journey and switch your browser to a 9:16 window if you’re aiming for Reels or Shorts.
- Download the video after verifying your account.
- In your editor, use the first 3–5 seconds of the animation as your opening shot.
- Cut from the map directly into a clip of the train interior or arrival at Lyon Part-Dieu or Perrache.
Because the distance is moderate, the km tracker will show a number that feels relatable to viewers, and the rail alignment helps emphasize that you’re on a train route, not a flight.
Delhi to London by air corridor: framing a long-haul story
Delhi → London is a classic long-haul arc that works well as a narrative backbone for a multi-part series or a single recap reel. In Map Route, choose Air corridor to visualize an estimated great-circle line between the two cities.
- Set From to Delhi and To to London, then pick Air corridor.
- Generate the journey and preview it at 1x and 2x to see which pacing fits your music.
- Capture the animation in 9:16 if you’re targeting vertical platforms.
- In your editor, overlay the route at key story beats: departure, mid-flight time-lapse, and landing.
- Use the km tracker as a storytelling element: freeze-frame or zoom on the final distance as you talk about how the journey felt.
Remember that Map Route’s air corridor is not a real-time flight tracker and doesn’t guarantee that airlines operate that exact path. It’s a clean, visual way to show the geography of a long trip.
Building multi-leg narratives with separate clips
If your trip has multiple legs—say, Delhi → Istanbul → Paris → London—you can still tell that story, even though Map Route doesn’t support multi-stop routes in a single generate.
- Generate and download a separate clip for each pair of cities (Delhi → Istanbul, Istanbul → Paris, Paris → London).
- In your editor, place the clips in order on the timeline, with short overlaps or transitions between them.
- Optionally, use different modes for variety—air corridor for long-hauls, road or rail for shorter segments.
- Cut between map shots and on-the-ground footage to keep the reel dynamic.
There’s no way to create a single Map Route file that combines air + rail + road in one animation. The workaround is always to generate each leg separately and edit them together.
Optimizing map overlays specifically for Reels and Shorts
Short-form platforms are unforgiving—your overlay has to be readable on a small screen, and it can’t drag on. Here’s how to tune Map Route animations for Instagram Reels, TikTok, and YouTube Shorts.
Keep it vertical and legible
- Always generate or replay the journey in a 9:16 window before capture so the route fills the vertical frame.
- Avoid shrinking the map too small in your editor; on phones, tiny overlays become unreadable.
- If you want picture-in-picture, consider using the map full-screen for 1–2 seconds, then shrinking it for the rest of the clip.
Use just enough of the animation
Map Route’s 8–28 second default length at 1x is useful, but you rarely need the entire run for a reel.
- Trim the clip down to the most dynamic section where the marker is moving clearly.
- Speed up the clip in your editor if you want a snappier feel beyond Map Route’s 2x or 4x playback tests.
- Match your cut points to the beat of your audio; Map Route doesn’t sync to music for you.
Balance overlays with subtitles and graphics
Your map overlay will compete with text, captions, and stickers on screen. To avoid clutter, plan your layout:
- Place the map higher or lower in the frame to avoid overlapping platform UI (like Instagram’s caption and buttons).
- Use simple, high-contrast subtitles that don’t cover the route line or km tracker.
- If you add stickers or GIFs, keep them away from the moving marker so the core animation stays readable.
Using Map Route overlays in longer travel vlogs
Even if your main content is on YouTube in 16:9, animated map routes can serve as clean chapter markers or explanatory cutaways. The workflow is similar, but you’ll want to generate in a wider aspect ratio.
Landscape intros and chapter cards
- Open Map Route in a wide browser window (768px+), so the player uses 16:9.
- Generate your route and download the clip after verification.
- Use the first few seconds as a cold open before your vlog footage starts, or as a chapter card between segments.
Because Map Route doesn’t add titles or voiceover, overlay your own text like "Day 3 – Paris to Lyon" or "Leg 2 – Crossing into Europe" in your editing software.
Voiceover and music: all in your editor
Map Route doesn’t handle audio uploads, beat-sync, or sound effects. To integrate the map smoothly into a vlog:
- Record a short voiceover explaining the route while the map animation plays.
- Duck the background music slightly under the voiceover to keep the narration clear.
- If you’re doing a montage, cut between map and B-roll on drum hits or obvious beats in your track.
Map Route vs heavier tools for animated map overlays
If you’ve experimented with desktop motion graphics or mobile storytelling apps, you might wonder where Map Route fits. It’s designed to be a fast, browser-based way to visualize real geography between two places—not a full motion design suite.
| Tool | Setup & workflow | Strengths for travel reels | Limitations to know |
|---|---|---|---|
| Map Route (maproute.org) | Browser-based; search From/To, pick one mode, Generate Journey, then download video with a verified account. | Very fast to create real geographic routes; automatic framing; vertical (9:16) or horizontal (16:9) based on window; works on phone and desktop. | Two endpoints only; no multi-stop editor; no in-app audio or titles; exports always include a “Made with MapRoute.org” watermark; browser capture can fail in some cases. |
| Adobe After Effects (with map plugins) | Desktop software; typically requires project setup, plugins, and manual keyframing or templates. | Highly customizable camera moves, labels, and styling; integrates deeply with professional editing workflows. | Steeper learning curve; paid subscription; slower for quick social edits; usually requires a capable computer. |
| Mobile storytelling apps (e.g., route-style travel apps) | Install an app; work within templates and built-in styles on your phone. | One-stop environment for clips, stickers, and audio on mobile; good for quick posts. | May be limited in map accuracy, export formats, or editing depth; often tied to specific templates or branding. |
For most creators, the sweet spot is: generate the geographic animation quickly in Map Route, then lean on your usual editor for everything creative—titles, overlays, audio, and pacing.
Pre‑publish checklist for map‑overlay travel reels
Before you post your reel
- I generated my route in Map Route with the correct origin and destination (e.g., Paris → Lyon or Delhi → London).
- I chose the right visualization mode (Road, Rail, Air corridor, or Geodesic) for the story I’m telling.
- I captured the animation in the aspect ratio I need (9:16 for Reels/Shorts, 16:9 for YouTube intros).
- I verified my Map Route account so I could download the video export.
- I understand the clip includes a “Made with MapRoute.org” watermark and the km tracker, and I’m okay featuring them.
- I imported the map clip into my editor and positioned it clearly (full-screen or picture-in-picture) without clutter.
- I trimmed the animation so it doesn’t slow down the reel, and I synced my cuts to the music or voiceover.
- I checked that on a phone screen the route line, marker, and key text are all readable and not hidden by platform UI.
FAQ
Can I create a multi-stop animated route for my travel reel in one go?
No. Map Route generates journeys between exactly two endpoints per file: one From and one To. There is no built-in multi-stop waypoint editor, and you cannot combine plane, train, and road in a single Map Route animation. To show multi-leg trips, generate each leg separately (e.g., City A → City B, then City B → City C) and stitch the clips together in your video editor.
Does Map Route work on phones for making Instagram Reels?
Yes. Map Route runs in modern mobile browsers as well as on desktop. On phones or narrow windows (under 768px wide), the player uses a 9:16 aspect ratio that fits Instagram Reels, TikTok, YouTube Shorts, and Stories. You can search places, generate journeys, and play animations on both phone and desktop, but image and video downloads still require a verified account.
Is there a way to export Map Route videos without a watermark?
Not at the moment. All Map Route downloads—both video and image—include a “Made with MapRoute.org” watermark. There is no watermark-free export option in the current product. If you’re layering the clip over your reel, treat the watermark as part of the design and position the map so it remains readable.
What video format does Map Route export for overlays?
Map Route captures the animation directly in your browser and lets you download it as a video. When your browser supports it, this is an MP4 file with H.264; otherwise it falls back to WebM. It is not a guaranteed server-rendered HD export, and capture can fail in some browsers, though the in-browser player will still work. Once downloaded, you can import the clip into editors like CapCut, VN, Premiere Pro, or Final Cut Pro.
Does Map Route sync the animation to my music or voiceover?
No. Map Route doesn’t handle audio uploads, beat detection, or soundtrack sync. It provides a visual animation with a duration based on distance (usually around 8–28 seconds at 1x), and you can preview it at 1x, 2x, or 4x speed. To sync with music or narration, you’ll trim and time the downloaded clip in your own video editor.
Is Map Route free to use for social content?
Yes. Map Route is free to use, with limits. Logged-out visitors can generate up to 3 journeys but cannot download images or videos. With a verified free account, you can perform 5 combined actions per UTC day—Generate Journey, Download Video, and Export Image each count as one use. There is no self-serve checkout; any paid plan is a manual upgrade via the account page.
Will Map Route always find my city pair for a travel reel?
Map Route relies on public geocoders (Photon with a Nominatim fallback) for place search, and on OSRM and OpenStreetMap data for road and rail geometry. You can usually search cities, regions, and countries worldwide as long as those services return results, but there’s no guarantee that every village, station, or airport code will resolve, or that road/rail geometry can be computed for every pair. If road or rail can’t be computed, Map Route will offer a geodesic line instead.
Can I add titles, stickers, or voiceover directly in Map Route?
No. Map Route is focused on generating the animated map and km tracker only. It doesn’t include tools for adding titles, subtitles, stickers, transitions, or voiceover. The recommended workflow is to download the map animation and then add all creative elements—text, audio, overlays, and cuts—in your usual video editor before posting to Instagram Reels, TikTok, or YouTube Shorts.